
Emergency Light Installation: Positions, Wiring, Remote Heads and Testing
How to install emergency lights and exit signs: where to put them, mounting heights, wiring an unswitched live, remote heads, central battery systems, commissioning tests and records.
Key points
- Emergency lights go at every exit, stair, change of direction or level, fire equipment and first-aid point, and along escape routes.
- Self-contained units need an unswitched permanent live from the local lighting circuit so they detect a failure of that circuit.
- Remote heads extend light from one battery unit to places such as large rooms, outdoor exits and cold stores.
- Commissioning includes a full-duration test and records; after that, monthly and annual tests keep the system compliant.
Emergency lighting is installed once and hopefully never used in anger, but when it is needed it must work first time. Good installation puts light exactly where people need it to escape, and wires the system so it reacts to the failures that matter.
Where emergency lights go
Mandatory points (EN 1838 / BS 5266-1, similar in many codes):
- At each exit door intended for emergency use
- Near stairs, so each flight gets direct light
- Near any other change of level
- At each change of direction
- At each intersection of corridors
- Near fire alarm call points and fire-fighting equipment
- Near first-aid points
- Outside and near each final exit, to a place of safety
- Mandatory exit signs and safety signs
Add fittings along routes until the required light level is met: typically at least 1 lux on the centre line of escape routes (EN 1838), or an average of 10 lux (1 fc) under NFPA 101.
Mounting heights
| Item | Typical height |
|---|---|
| Twin-head units | 2.0–2.5 m |
| Bulkheads | 2.0–2.5 m, or ceiling |
| Exit signs above doors | 2.0–2.5 m |
| Ceiling emergency downlights | Ceiling |
| Low-level way-guidance | Near floor (where smoke may collect) |
Keep fittings below smoke layers where possible, and make signs visible from every point on the route.
Wiring self-contained units
- Non-maintained: permanent live, neutral, earth from the local lighting circuit
- Maintained: permanent live plus switched live, so the lamp also works as a normal light
- Same circuit: the permanent live should come from the lighting circuit for that area, so a failure of that circuit triggers the emergency light
- Key switch: a test key switch for each area makes monthly testing simple
Follow local wiring regulations; in many countries this work must be done and certified by a qualified electrician.
Remote heads
Remote heads are lamp heads powered from a separate battery unit or central system:
- Light large spaces from one battery
- Put batteries in a warm, accessible place while heads sit in cold or hazardous areas
- Light outdoor exits from an indoor battery
Cable size and length matter: low-voltage heads lose output over long runs. Use fire-resistant cable where required.
Central battery systems
Large buildings sometimes use a central battery room feeding all emergency fittings through fire-resistant cables. Benefits are centralised testing and longer battery life; drawbacks are cable cost and the need to protect circuits against fire. For a comparison with self-contained units, see types of emergency lights.
Exit signs
- Visible from every point on the escape route
- Directional arrows at changes of direction
- Maintained (lit all the time) in public buildings
- Sized for viewing distance
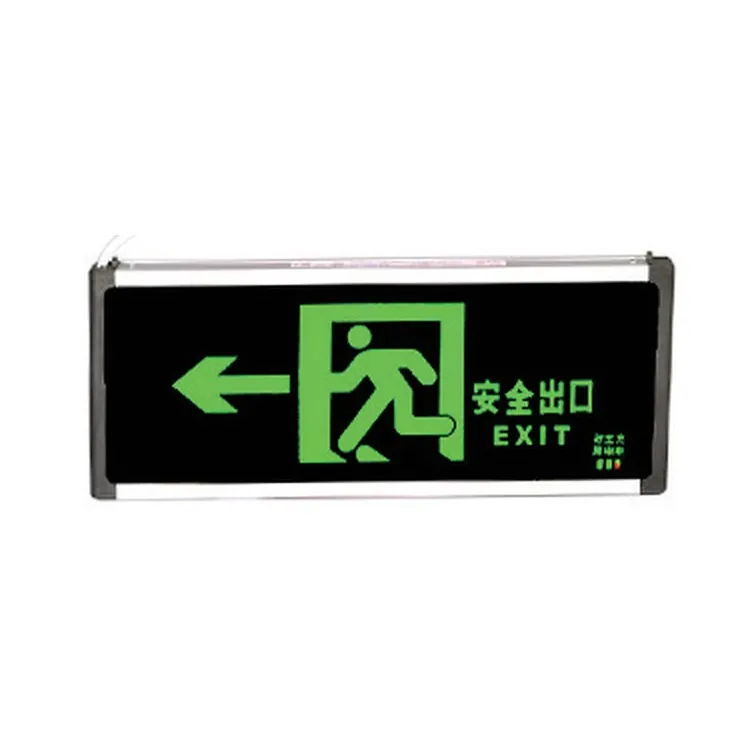
Our LED exit signs (3 or 5 W) give at least 90 minutes of backup with switchover in under 2 seconds and charge within 24 hours.
Hazardous areas
Emergency lights in zones with flammable gas or dust must be certified for the zone and installed with certified glands. Our explosion-proof emergency light (Ex d IIC T4, 2 hours) is designed for such areas. See explosion-proof emergency and exit lights.
Commissioning
- Charge batteries for the time stated by the maker, often 24 hours
- Simulate mains failure for each area with the test switch
- Run a full-duration test (for example 90 minutes or 3 hours)
- Check every fitting is lit at the end
- Measure light levels on escape routes
- Record results, fitting positions and any faults
- Hand over drawings, test records and the log book
After installation
Monthly short tests and an annual full-duration test keep the system compliant; see our emergency light testing guide for the routine and records.
Common installation mistakes
| Mistake | Effect |
|---|---|
| Permanent live from a different circuit | Emergency light does not detect local failure |
| No test switch | Monthly tests disrupt the whole building |
| Fittings too far apart | Dark sections on routes |
| Signs hidden by beams or ducts | Route not visible |
| Batteries in hot ceiling voids | Short battery life |
| Wrong fittings in hazardous zones | Ignition risk |
Design before installation
A short design pass avoids most problems: mark exits, stairs, changes of direction and equipment on the plan, add fittings at each, then add fittings along routes and open areas until light levels are met. Check sign visibility from each room.
Coordinating with other trades
Emergency lighting depends on other work: ceiling grids, fire alarm call points, signage and doors. Agree positions with the architect and fire engineer early, and check them again after the ceiling and furniture layouts are final. Last-minute changes to walls or racks often block signs or leave sections of route unlit.
Upgrading old systems
Older emergency lights with fluorescent lamps and Ni-Cd batteries can be replaced with LED units that last longer on battery and need less maintenance. When upgrading, check that positions still match the current layout, because walls, doors and racks change over the years. Replace exit signs that no longer meet current pictogram standards, and add self-test fittings to cut the effort of monthly tests in large buildings.
Ordering
Send building plans with escape routes, the required duration, hazardous areas and the wiring method you prefer. We will propose exit signs, emergency fittings, remote heads and explosion-proof units where needed.
Sources
Frequently asked questions
Where should emergency lights be installed?
Near each exit door, at every staircase so each step is lit, at changes of direction and level, at fire alarm call points and fire-fighting equipment, at first-aid points, outside final exits, and along escape routes so the required light level is met throughout.
How do you wire an emergency light?
Self-contained emergency lights are wired with a permanent (unswitched) live, neutral and earth from the same lighting circuit that serves the area, so the unit switches to battery if that circuit fails. Maintained units also take a switched live. Always follow local regulations.
What is a remote head emergency light?
A lamp head without its own battery, powered from a separate emergency battery unit or central system. It lets one battery serve several heads, for example in large halls, outdoor exits or areas too cold for batteries.